- التسوق ، جعل بسهولة.
- /
- احصل على التطبيق!
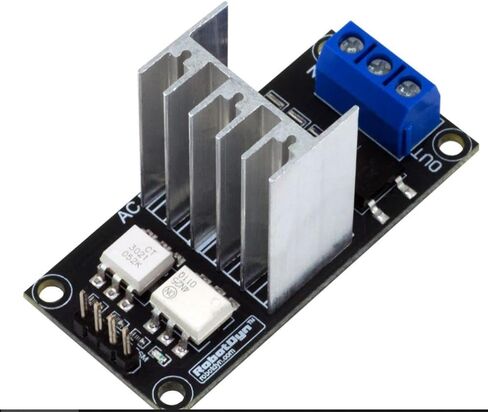
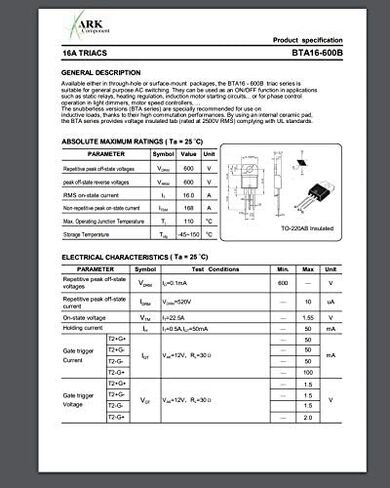
The AC Dimmer is designed to control the alternating current voltage, which can transfer current up to 240V/8А. In most cases, Dimmer is used to turning the power ON/OFF for lamps or heating elements, it can also be used in fans, pumps, air cleaners, e.t.c.
Lately, Dimmer has become an often-used decision for smart home systems. For example, when you need to smoothly change the light brightness. The lamp is slowly turning ON or OFF, creating a comfortable atmosphere. Dimmer works most effectively with filament lamps. It's less stable with low brightness dimmable LED lamps, but with moderate and high brightness it will perform a solid job. Note that luminescent lamps (gas discharge lamps) do not support dimming.
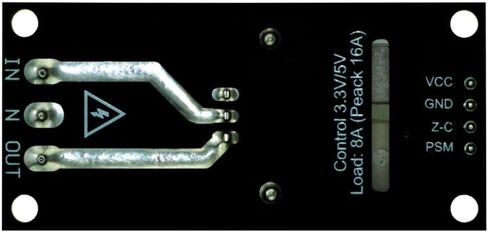
A power of the dimmer is isolated from the control part, to exclude the possibility of high current disruption to a microcontroller.
The logical level is tolerant to 5V and 3.3V, therefore it can be connected to the microcontroller with 5V and 3.3V level logic.
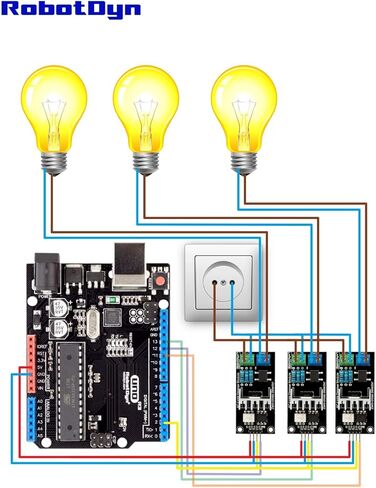
In Arduino, a dimmer is controlled with RBDdimmer.h library, which uses external interrupts and process time interrupts. It simplifies the code writing and gives more processing time for the main code. This is why you can control multiple Dimmers from one microcontroller.
You can download RBDDimmer.h library and a few examples in «Documents» or on GitHub. We are constantly updating our library, so we recommend checking for website updates or subscribe to our newsletter.
Dimmer is connected to Arduino controllers via two digital pins. First (Zero) to control the passing of Phase Null of AC, which is used to initiate the interrupt signal. Second (DIM/PSM) to control (dim) current.
Note that Zero requires connection to designated microcontroller pins (which are different depending on the model of Uno, Nano, Leonardo, Mega), since it tied to microcontroller interrupts.
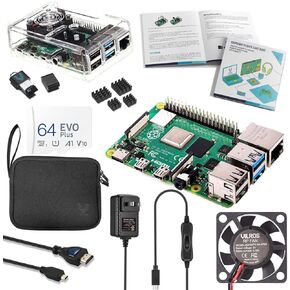 مجموعة Vilros Raspberry Pi 4 الكاملة للمبتدئين - تتضمن لوحة Raspberry Pi 4، وحقيبة تبريد بمروحة، وبطاقة SD صغيرة محملة مسبقًا بسعة 64 جيجابايت والمزيد (8 جيجابايت، حافظة سوداء)
KWD 34
مجموعة Vilros Raspberry Pi 4 الكاملة للمبتدئين - تتضمن لوحة Raspberry Pi 4، وحقيبة تبريد بمروحة، وبطاقة SD صغيرة محملة مسبقًا بسعة 64 جيجابايت والمزيد (8 جيجابايت، حافظة سوداء)
KWD 34
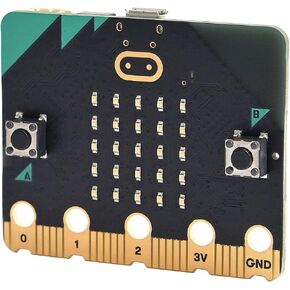 لوحة ELECFREAKS BBC Micro: bit V2.2 للتشفير والبرمجة (لا تشتمل على كابل Micro USB وحامل البطارية)
KWD 13.500
لوحة ELECFREAKS BBC Micro: bit V2.2 للتشفير والبرمجة (لا تشتمل على كابل Micro USB وحامل البطارية)
KWD 13.500
 سيد ستوديو شاشة دائرية تعمل باللمس مقاس 1.3 انش، دقة 240×240، لون 65 كيه، ار تي سي، شحن اي سي، فتحة بطاقة تي اف، موصل جيه اس تي 1.25، متوافقة مع جميع شياو، اتش ام اي، سمارت هوم، الاجهزة القابلة
KWD 12.500
سيد ستوديو شاشة دائرية تعمل باللمس مقاس 1.3 انش، دقة 240×240، لون 65 كيه، ار تي سي، شحن اي سي، فتحة بطاقة تي اف، موصل جيه اس تي 1.25، متوافقة مع جميع شياو، اتش ام اي، سمارت هوم، الاجهزة القابلة
KWD 12.500
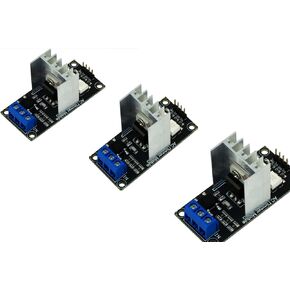 3 قطع أصلية من وحدة التحكم في الإضاءة الخافتة القابلة للبرمجة PWM Ac 110 فولت - 220 فولت تيار متردد متوافقة مع منطق 50/60 هرتز 3.3 فولت/5 فولت متوافق مع Arduino وSTM وARM وRaspberry
KWD 10.500
3 قطع أصلية من وحدة التحكم في الإضاءة الخافتة القابلة للبرمجة PWM Ac 110 فولت - 220 فولت تيار متردد متوافقة مع منطق 50/60 هرتز 3.3 فولت/5 فولت متوافق مع Arduino وSTM وARM وRaspberry
KWD 10.500