- Shopping, made easy.
- /
- Get the app!
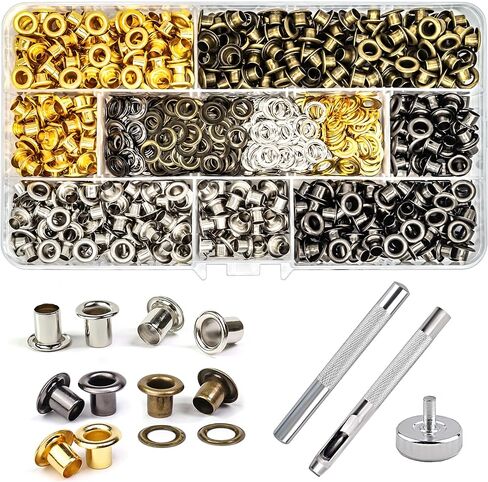
Grommet Eyelet Pliers Kit, Caffox 3/16 Inch Grommet Tool Kit with Metal Eyelets and Metal Washers
Specification:
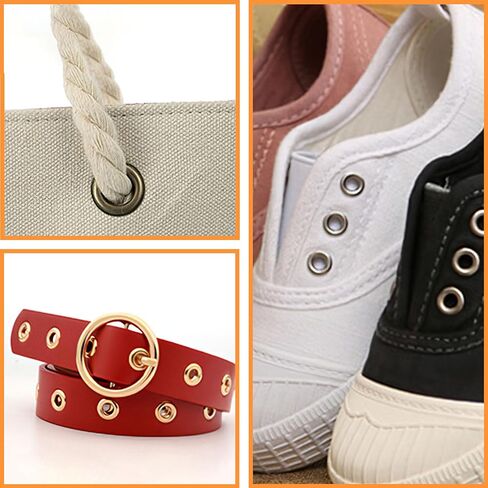
Grommets color: As the picture showed
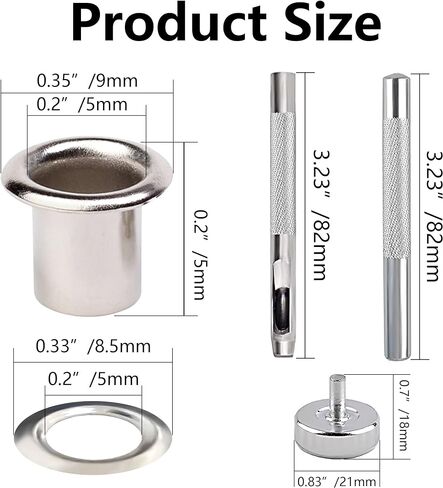
Metal grommets size:
Outsider diameter: approx. 9 mm (11/ 32 inch)
Insider diameter: approx. 5 mm (3/ 16 inch)
Barrel length: 3.5 mm (5/ 32 inch)
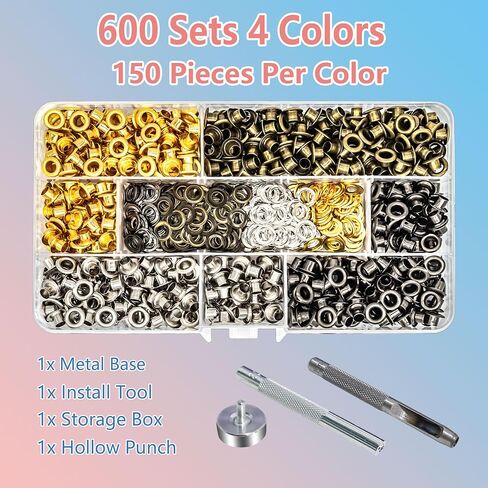
Package includes:
600 Sets of grommets (12 colors and 50 sets each color )
Each set of grommet includes 2 parts: an eyelet and a washer
1 x Punch
1 x Base
1 x Install rod
1 x Storage box
1 x Instructor
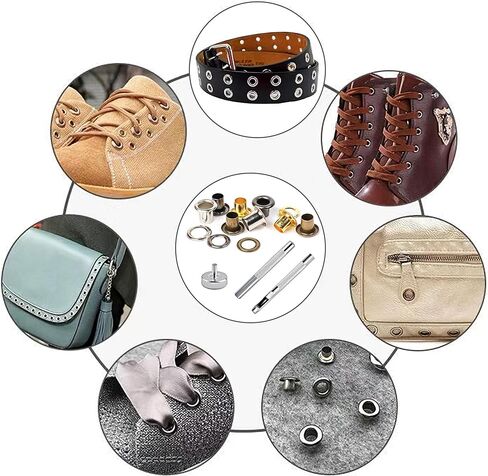
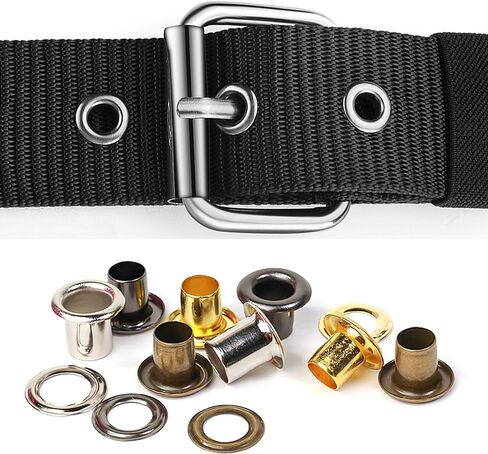
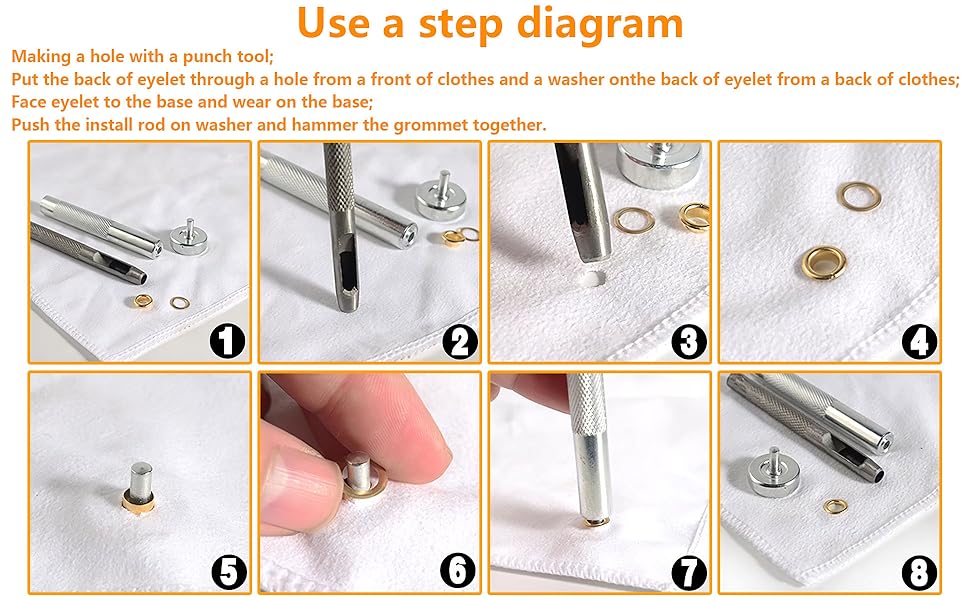
Easy to Use:
Step 1: Tap the punch with a hammer to punch a hole.
Step 2: Put an eyelet through the hole of front of the object, and put the washer on the back of eyelet.
Step 3: Face the eyelet to the base and put it on the base.
Step 4: Put the install rod on washer, then tap the eyelet and washer together with your hammer.
Note: Please keep them away from children to avoid choking.

 -25%
Elastic Band for Sewing, Colored Wig Band Elastic Bands 1 Inch 16 Yards Knitted Elastic Band Melting Band Elastic Band 20 Colors Options(Black)
KWD 3
-25%
Elastic Band for Sewing, Colored Wig Band Elastic Bands 1 Inch 16 Yards Knitted Elastic Band Melting Band Elastic Band 20 Colors Options(Black)
KWD 3
 12 Pieces Sewing Mark Pencil Tailor's Marking and Tracing Tools Free Cutting Crayons Sewing Fabric Pencil,6 Colors (6 Colors)
KWD 4
12 Pieces Sewing Mark Pencil Tailor's Marking and Tracing Tools Free Cutting Crayons Sewing Fabric Pencil,6 Colors (6 Colors)
KWD 4
 GUGULUZA 50 Yards Polyester Boning for Sewing, 6/8/10/12/15 mm Sew-Through Low Density Plastic Sewing Corset Boning for Wedding Party Bridal Gowns Dress (Black - 12mm)
KWD 7
GUGULUZA 50 Yards Polyester Boning for Sewing, 6/8/10/12/15 mm Sew-Through Low Density Plastic Sewing Corset Boning for Wedding Party Bridal Gowns Dress (Black - 12mm)
KWD 7
 Zombie Outbreak Response Team Biohazard Morale Tactical Patch Embroidered Applique with Hook and Loop Fastener Backing Patch (Black+Red)
KWD 2.500
Zombie Outbreak Response Team Biohazard Morale Tactical Patch Embroidered Applique with Hook and Loop Fastener Backing Patch (Black+Red)
KWD 2.500