- Shopping, made easy.
- /
- Get the app!
Product description
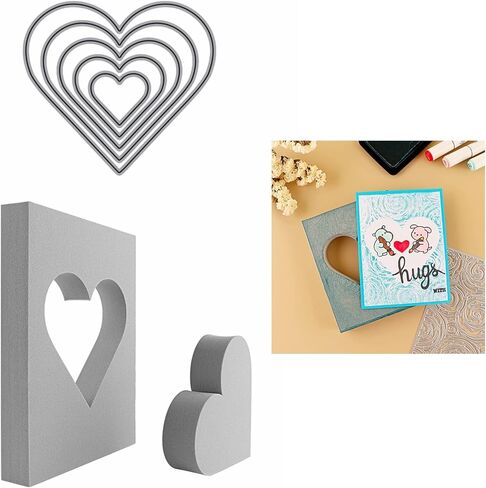
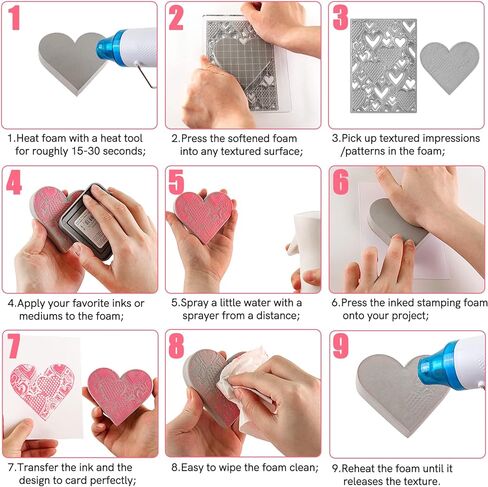
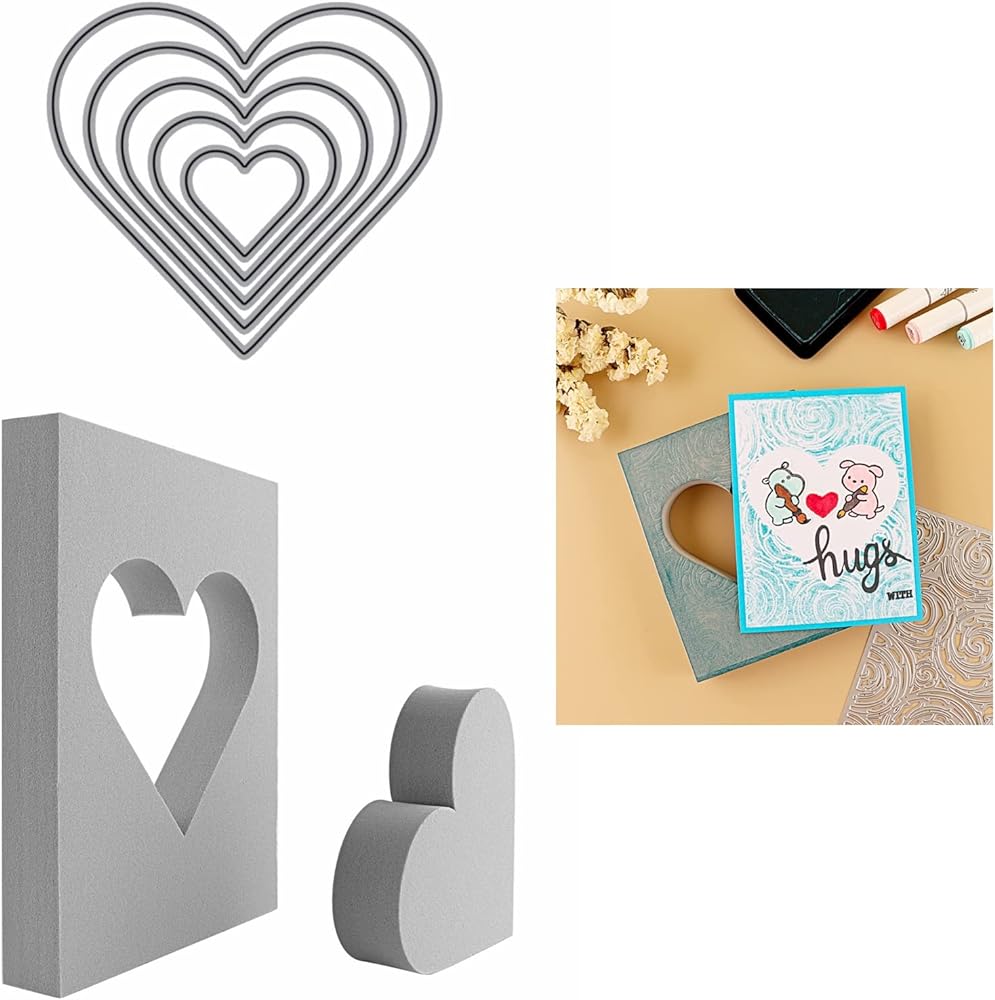
How to use:
1.Heat foam with a heat tool for roughly 15-30 seconds.(Tips: Keep your heat tool moving to ensure you heat the entire foam surface evenly.)
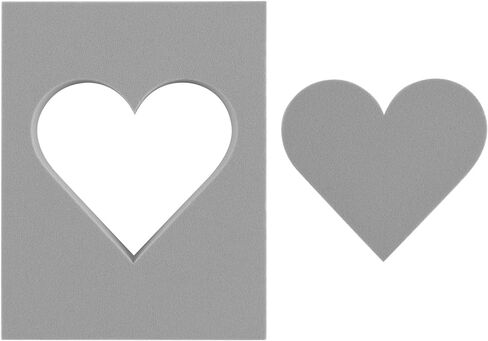
2.Once you've done heating,immediately press the softened foam into any textured surface (eg.embossing folders, stamps, dies, stencils and other household items)to pick up nice textured impressions/patterns.(Tips:Using acrylic blocks as a handle can give you more pressure when you press.)
3.Apply your favorite inks or mediums to the foam. (Tips: 1.Please use dye ink pad rather than pigment ink pad, as dye ink is much easier to clean.The dye inks which don't usually stain stamps also don't stain your stamping foams.)
4.Spray a little bit of water with your sprayer from a little distance.(Tips: Hold the foam about a foot away and then spray just a little mist.)
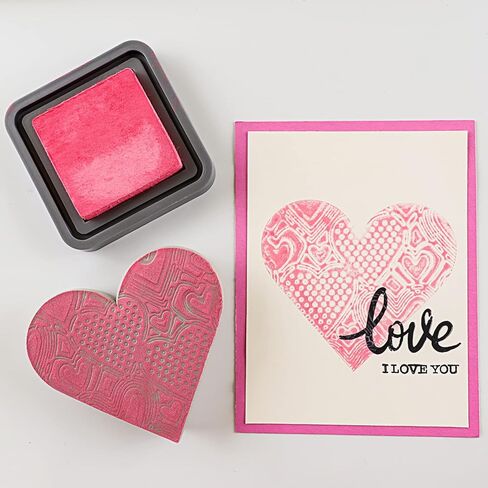
5.Press the inked stamping foam onto your project to transfer the ink and the design.(Note: It actually creates a reverse pattern from the actual stamp!)
6.Wipe the stamping foam clean with a cloth or baby wipes.(Tips: If some inks stain, try to clean with stamp cleaners or rubbing alcohol.)
7.To release the impression and reuse the stamping foam, reheat it until it softens and releases the texture.
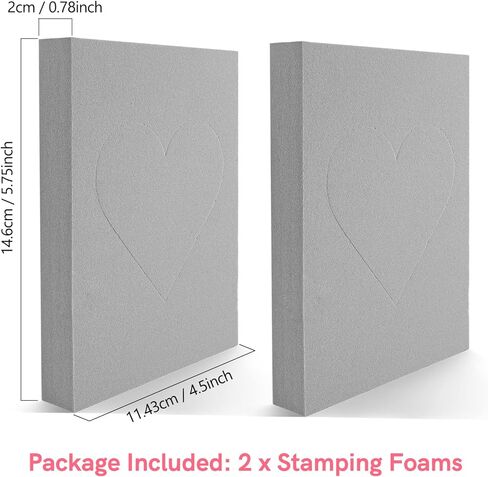
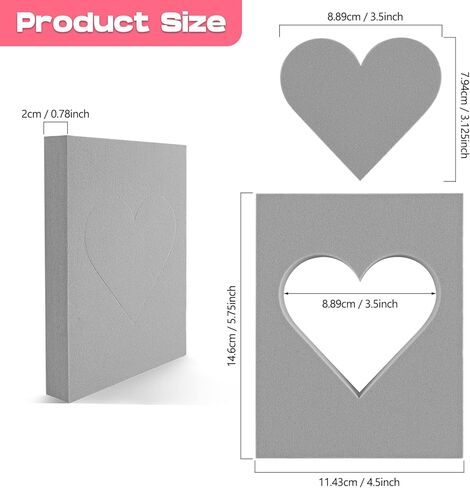
8.Please note:More heating time and more pressure are required for the larger stamping foam, because the surface is a lot larger! There won't be very deep impressions in the larger stamping foam, but it's ok and it's just what we want. You just need to apply ink with light pressure, and the nice patterns will show up.

 -36%
Briartw 2 Pieces A6 mini Album Storage-Clear Sticker Photo Storage Album-Stamp Cutting Dies Storage Book Organizer Folder Mini Storage Booklet with 40 Pages Hold Postcards Stickers Photo Die Cuts
KWD 4.500
-36%
Briartw 2 Pieces A6 mini Album Storage-Clear Sticker Photo Storage Album-Stamp Cutting Dies Storage Book Organizer Folder Mini Storage Booklet with 40 Pages Hold Postcards Stickers Photo Die Cuts
KWD 4.500
 Snow Globe Metal Cutting Dies Hollow-Carved DesignStencil for DIY Making Decoration Embossing Dies for Scrapbooking Album Paper Cards Art Crafts
KWD 3.500
Snow Globe Metal Cutting Dies Hollow-Carved DesignStencil for DIY Making Decoration Embossing Dies for Scrapbooking Album Paper Cards Art Crafts
KWD 3.500
 10 Pack Crafting lnk Blending BrushBlending Paper Craft Background Blender Painting Brushes for Scrapbooking Background Card Stencils Die Cuts Card Making Stamping Crafting Tools
KWD 5
10 Pack Crafting lnk Blending BrushBlending Paper Craft Background Blender Painting Brushes for Scrapbooking Background Card Stencils Die Cuts Card Making Stamping Crafting Tools
KWD 5
 Briartw Words Phrases Greetings Wishes Blessings Clear Rubber Stamp DIY Scrapbooking Stamping Seal Silicon Stamp Craft Cardmaking Art Album Decor Gift Paper Card 6x7.5inch
KWD 3
Briartw Words Phrases Greetings Wishes Blessings Clear Rubber Stamp DIY Scrapbooking Stamping Seal Silicon Stamp Craft Cardmaking Art Album Decor Gift Paper Card 6x7.5inch
KWD 3