- Shopping, made easy.
- /
- Get the app!
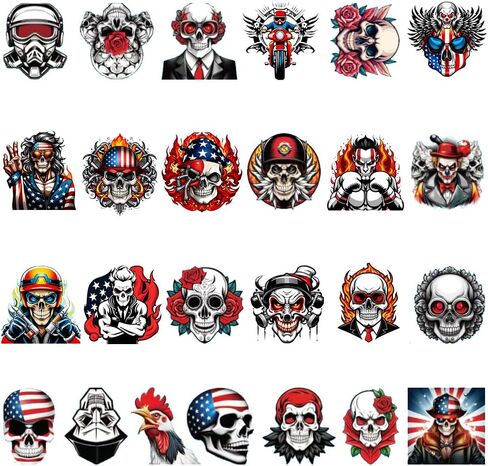
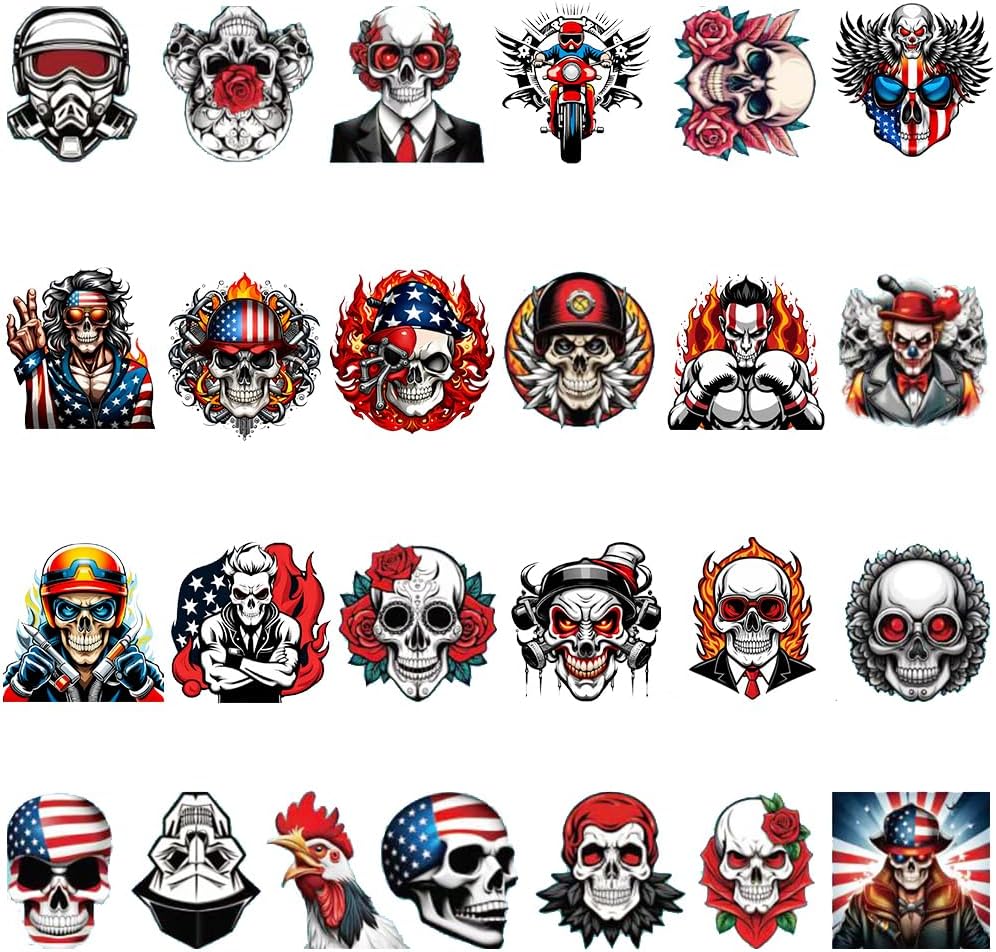
1: Preheat: Start by preheating your household iron to the appropriate temperature. Refer to the instructions provided with the iron-on transfer decal for the recommended heat setting.
2: Prepare the Surface: Place the garment on a flat, heat-resistant surface such as an ironing board. Make sure the surface is clean and smooth without any wrinkles or creases.
3: Position the Decal: Carefully position the iron-on transfer decal on the desired location of the garment. Double-check the alignment and placement to ensure it's exactly where you want it.
4: Apply Heat and Pressure: Once the decal is in place, firmly press the heated iron on top of the decal. Apply steady pressure and move the iron in a slow, circular motion. Make sure to cover the entire decal area, applying heat and pressure evenly.
5: Follow Time Guidelines: Refer to the instructions provided with the iron-on transfer decal for the recommended time to apply heat. Typically, it ranges from 10 to 30 seconds. Ensure you follow the recommended time to achieve optimal adhesion.
6: Let it Cool: After the recommended time, carefully lift the iron and set it aside. Allow the decal and garment to cool completely before handling. This will ensure that the transfer properly adheres to the fabric.
7: Peel off the Backing: Once the decal and garment have cooled down, gently peel off the backing paper or plastic from the decal. Take your time to avoid lifting any part of the transfer.
8: Test Adhesion: To ensure a secure bond, lightly tug on a corner of the decal. If it lifts or doesn't stick properly, place the backing back on and reapply heat and pressure for a few more seconds.
9: Finished! Your iron-on transfer decal is now successfully applied to your garment. Enjoy your customized clothing and showcase your unique style!
 U-Sky Iron on Alphabet Patches, 26pcs Cute Animal Design A to Z Letter Iron-on Patch for Kids Clothing, Sew-on Appliques for Backpacks/Jeans/Clothes to Cover Logo/Rip (Design#1)
KWD 3
U-Sky Iron on Alphabet Patches, 26pcs Cute Animal Design A to Z Letter Iron-on Patch for Kids Clothing, Sew-on Appliques for Backpacks/Jeans/Clothes to Cover Logo/Rip (Design#1)
KWD 3
 GI Joe Halloween Costume Embroidered Iron On Patches
KWD 6.500
GI Joe Halloween Costume Embroidered Iron On Patches
KWD 6.500
 U-Sky 20 Pieces Random Pack Morale Tactical Vest Patches with Hook and Loop for Backpacks, Mix Random Pack Patches for Tactical Caps, Tactical Gears, Uniforms
KWD 2.500
U-Sky 20 Pieces Random Pack Morale Tactical Vest Patches with Hook and Loop for Backpacks, Mix Random Pack Patches for Tactical Caps, Tactical Gears, Uniforms
KWD 2.500
 U-Sky Iron on Patches for Motorcycle Jackets, 3pcs Black Lightning Iron-on Patch, Sew on Appliques for Clothes Backpacks Jeans Bags Bedsheets to Cover Logo Rip Size 2.5x0.8inch
KWD 2
U-Sky Iron on Patches for Motorcycle Jackets, 3pcs Black Lightning Iron-on Patch, Sew on Appliques for Clothes Backpacks Jeans Bags Bedsheets to Cover Logo Rip Size 2.5x0.8inch
KWD 2