- Shopping, made easy.
- /
- Get the app!
About Ostomy Pouching Systems
Colostomy bag with clamps closure
This is an one-piece ostomy system; the ostomy pouch and skin barrier are joined together permanently.
The odor-free pouch collects stool or urine while the skin barrier is placed around the stoma to protect the skin and hold the bag securely.
This type is simple to use and easy to apply and remove.
How to change one piece colostomy bag?
1. Empty Ostomy Bag
If using a drainable colostomy or ileostomy bag, empty the stool and other waste of your stoma bag into the toilet first,
then wash your hands with soap and water and dry with a clean towel.
2. Remove Ostomy Bag
Apply a small amount of medical adhesive remover spray or wipe (not included) on top
and around the edge of the flange to be removed and wait a few seconds, then remove the pouch and put it in a trash bag.
3. Clean Your Stoma
Use water to wet a non-woven wipe and wash stoma and surrounding area, then dry thoroughly.
4. Measure Your Stoma
Use your measuring card to find the circle size that matches the size of your stoma. Do Not touch the card to your skin.
5. Cut the Flange
If your pouch needs adjusting, cut a hole to the required size with a pair of pouch cutting scissors.
6. Remove Flange Cover
Remove the protective cover from the adhesive Flange/wafer on the fresh stoma bag.
If using a drainable pouch, make sure the opening is securely closed with the clamp fastener before applying the new pouch.
7. Attach the Pouch
Fit bag from the bottom and smooth over the adhesive from the stoma to the edge, ensuring there are no creases that might cause leakage.
8. Ensure good adherence
Hold in place with your hand for 30 seconds to a minute, as the warmth improves the adhesion to your skin.
 -6%
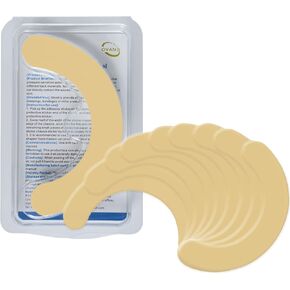
20 PCS Ostomy Barrier Strips,Medical Grade Nonwovens Ostomy Strips Y Adhesive Barrier Strips Better Seal for Ostomy Bags
KWD 8
 Ostomy Paste, Alcohol-Free Skin Barrier Ostomy Paste for Stoma Filling to Prevent leaks, Stoma Care Supplies Osotmy Supplies (1 Box)
KWD 6
 20 Pcs Elastic Ostomy Barrier Strips,Medical Grade Hydrocolloid Waterproof Leak,Skin Adhesive Ostomy Barrier Tape for Colostomy Stoma Bags
KWD 7
 Medical Adhesive Remover,Sting Free Adhesive Releaser Spray for Medical Tape and Adhesive Appliances,1oz(4 Bottles)
KWD 16.500