- Shopping, made easy.
- /
- Get the app!
Package include:
1PC 905-211 Bonnet and Poppet Assembly Repair Kit
Fits for PVB Model 765CBV 1/2""& 765DBV 3/4"", Combines Bonnet Assembly Kit 905-047 and Poppet Assembly Kit 905-049.
How to install:
1.Please clean the debris in the valve before installation;
2. Close the bottom valve handle and turn it to the level to close the water outlet;
3. Unscrew the small nut on the bell, and open the bell;
4. Open the plastic bonnet and remove internal debris. There should be no plastic fragments inside the device (special attention: do not remove the metal piece at the bottom of the reset device to prevent the spring under it from hurting you);
5. Replace with new bonnet and poppet valve kit and tighten by hand;
In order to avoid replacing the bonnet and poppet valve again, if the temperature continues to be low and freezing, please cover the backflow prevention device with a blanket or heat preservation bag. 6. Place the bell on top of the metal screw, and then tighten the small nut. Be careful not to tighten it too tightly, just twist it by hand, just to fix the metal bell on the device, and keep a certain tension.

 Replacement model #2-11103 brake cable Compatible for Parking Brake, 2 WD Chuck Wagon, Multiple models
KWD 9.500
Replacement model #2-11103 brake cable Compatible for Parking Brake, 2 WD Chuck Wagon, Multiple models
KWD 9.500
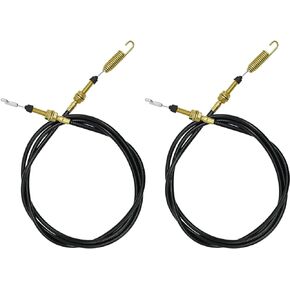 2pcs 2-11082 Shifter Cable Replacement for Chuck Wagon CW-11, CW-413 CW-265 Go-Karts Parts and Accessories Shifter cable
KWD 12
2pcs 2-11082 Shifter Cable Replacement for Chuck Wagon CW-11, CW-413 CW-265 Go-Karts Parts and Accessories Shifter cable
KWD 12
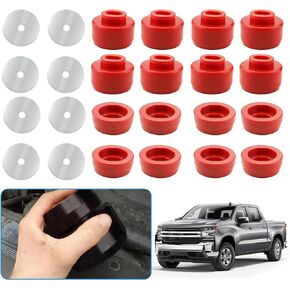 Body and Cab Mount Bushing Kit for 1999-2014 Chevy Silverado & Sierra 1500/2500 2WD/4WD Polyurethane Body Cab Mounts Replace 7-141, Black
KWD 23
Body and Cab Mount Bushing Kit for 1999-2014 Chevy Silverado & Sierra 1500/2500 2WD/4WD Polyurethane Body Cab Mounts Replace 7-141, Black
KWD 23
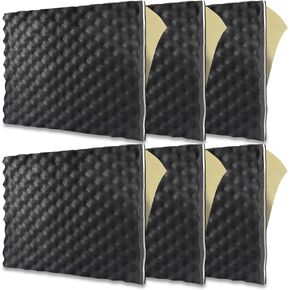 TroyStudio 3 in 1 Car Sound Deadener - 1pc 19 X 16 X 0.7 Inches Self-Adhesive Butyl Closed Cell Foam Panel Heat Shield Automotive Noise Insulation Mat - Super Thick Sound Proofing Deadening Material
KWD 8.500
TroyStudio 3 in 1 Car Sound Deadener - 1pc 19 X 16 X 0.7 Inches Self-Adhesive Butyl Closed Cell Foam Panel Heat Shield Automotive Noise Insulation Mat - Super Thick Sound Proofing Deadening Material
KWD 8.500


