- Shopping, made easy.
- /
- Get the app!
Specification
- Color: Red
- Material: ABS plastic
- Size: 19.5x29cm / 20x27cm
- Condition: 100% Brand New
Package Included:
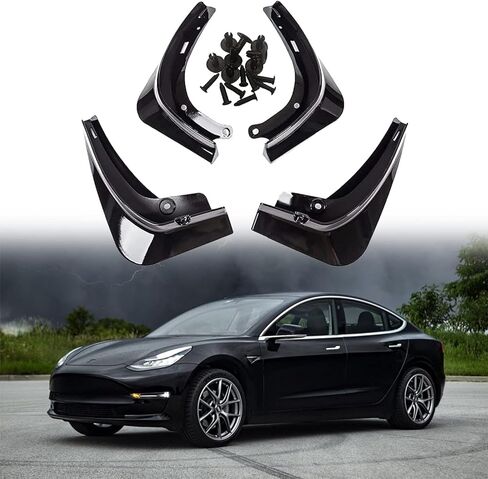
4pcs of Set (2pcs Front L/R and 2pcs Rear L/R)
1 set Mounting Accessories
Why do you need mudguards?
The original car's fender was poor in elasticity and could easily break when it hits rocks and other bad road conditions, and could not protect the car.
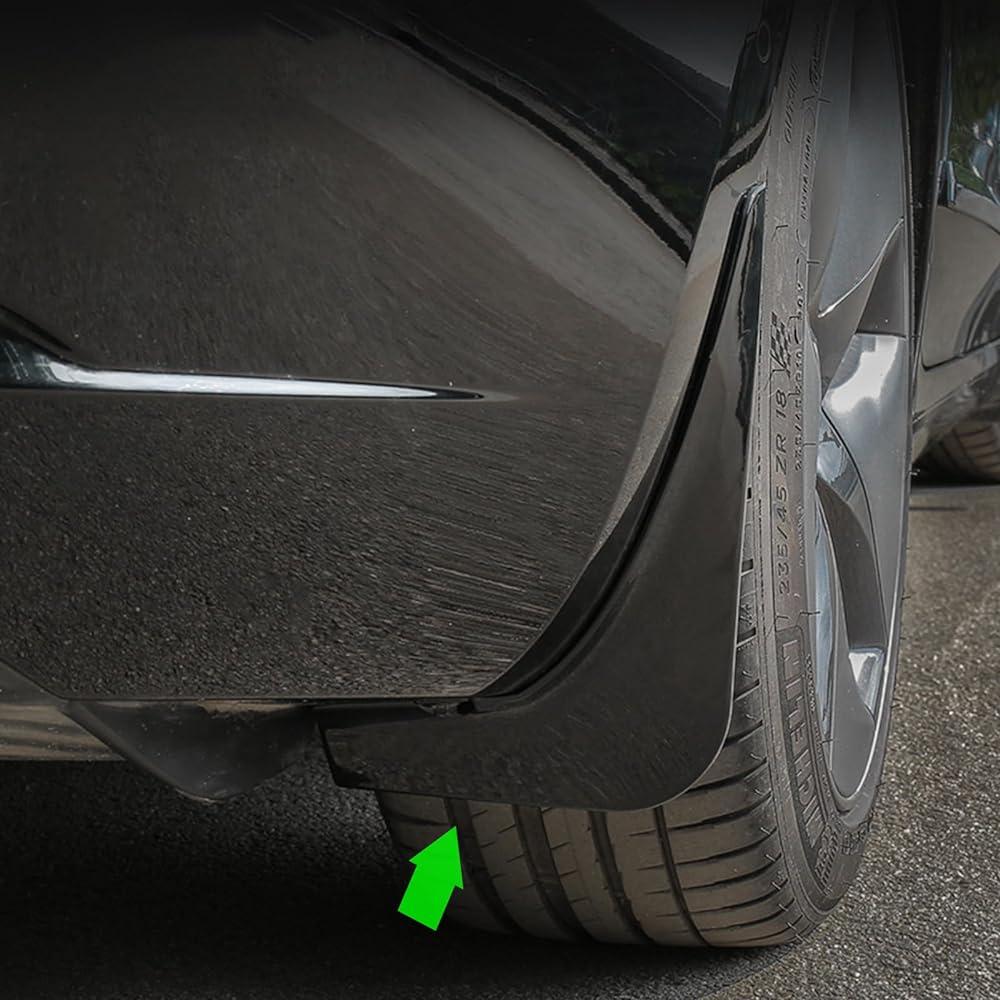
This fender is optimized and has strong elasticity to better protect the lower part of the Model 3 from snow, salt, sand, rocks and other debris from the wheels.
Why choose us?
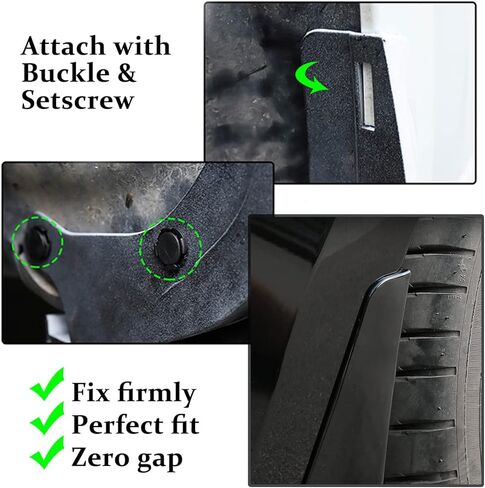
Customized for 2016 2017 2018 2019 2020 2021 2022 2023 Tesla model 3, perfect fit and truely no need to drill holes
Pearl white appearance, makes your model different from the others
This fender uses high-quality materials, has a prolonged service life, a stylish appearance, and is perfectly matched to the original car.
How to install it?
Step 1: Unscrew the original car screws at the location to be installed,
Step 2: One-to-one correspondence according to the directions marked on the mudguard
Step 3: Install the screws (need to force the screws in)
Step 4: Check to make sure the screws are all fixed
 -5%
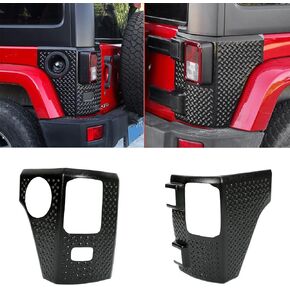
Wocch JL Rear Corner Guards Body Armor Kit Tail Light Trim Covers Compatible with 2018-2023 Jeep Wrangler JL JLU Rear Quarter Panel Black Diamond Armour
KWD 28.500
-5%
Wocch JL Rear Corner Guards Body Armor Kit Tail Light Trim Covers Compatible with 2018-2023 Jeep Wrangler JL JLU Rear Quarter Panel Black Diamond Armour
KWD 28.500
 Tie Down Anchors Cleats Heavy Duty Boxlink Bed Tie Downs with Plates Brackets Anti-Theft Screws for Ford 2015-2023 F150 F250 F350 Pickup Truck Accesories
KWD 18.500
Tie Down Anchors Cleats Heavy Duty Boxlink Bed Tie Downs with Plates Brackets Anti-Theft Screws for Ford 2015-2023 F150 F250 F350 Pickup Truck Accesories
KWD 18.500
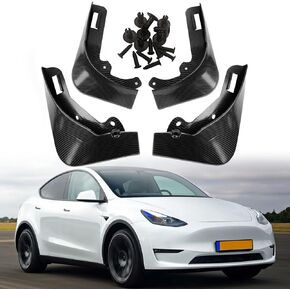 Mud Flaps for Tesla Model Y 2020 2021 2022 2023 2024 Splash Guards Front Rear Fender Protection Mudflaps No Need to Drill Holes (Set of 4, ABS Carbon Fiber)
KWD 16.500
Mud Flaps for Tesla Model Y 2020 2021 2022 2023 2024 Splash Guards Front Rear Fender Protection Mudflaps No Need to Drill Holes (Set of 4, ABS Carbon Fiber)
KWD 16.500
 for Jeep JK Rear Corner Guards Body Armor Kit Tail Light Trim Covers Compatible with 2007-2018 Jeep Wrangler JK JKU Rear Quarter Panel Black Diamond Armour, Replacement for 11651.01
KWD 32
for Jeep JK Rear Corner Guards Body Armor Kit Tail Light Trim Covers Compatible with 2007-2018 Jeep Wrangler JK JKU Rear Quarter Panel Black Diamond Armour, Replacement for 11651.01
KWD 32