- Shopping, made easy.
- /
- Get the app!
0887785 RK 009M2-VT 1" 009M2 Total Relief Valve Repair Kit Assembly
- Compayibility: Suitable for 1" LF009M2, 009M2 Reduced Pressure Valve Assembly Backflow Preventers and Series 009 & LF009 Reduced Pressure Zone Assemblies.
- Replace OE Part Number: 0887785, 887785 RK, 009M2-VT
- Series: RK-009
- Package Include: 1 seat, 1 seat 0-ring, 1 stem and diaphragm assembly, 1 stem 0-ring, 1 cover 0-ring and 1 relief valve spring
- Material: ABS, rubber and steel
- Location: Between the retainer and cover
- Special Feature:
1. Excellent corrosion and water resistance, high strength performance.
2. Each part is manufactured to meets or exceeds OEM specifications, precision-engineered and tested to provide reliable replacement.
3. Easy to install with no special tools required. Save your charge.
4. Directly replace your old, worn out relief valve.
How to Replace:
1. Holding the bonnet, remove the four or six safety bonnet bolts.
2. Lift the cover straight up. The stem and diaphragm assembly usually remains with the cap when removed. At this time, the safety valve spring will be free in the body.
3. The safety valve seat is located at the bottom of the valve body hole. When replacing the safety valve diaphragm and/or disc, the safety valve module can be easily disassembled without special tools.
Notice
The disc rubber is molded into the disc holder and supplied as a disc holder assembly.
4. Reassemble the safety valve, press the seat firmly into the valve body, place the spring in the center of the seat, and insert the bonnet and safety valve block as a whole directly into the hole. Press down on the cover to ensure proper alignment. Insert and tighten the bolts.
Notice
If the cap does not sit flat on the body, the stem assembly will bend and damage may result. Re-align the stem and cap before inserting the bolts.
 EZRODI 60pcs Quick Connect Locking Clips Blue Push Connect Clips Plumbing Clip for Locking Quick Connect Fittings(Pack of 60) (60, 1/4")
KWD 3
EZRODI 60pcs Quick Connect Locking Clips Blue Push Connect Clips Plumbing Clip for Locking Quick Connect Fittings(Pack of 60) (60, 1/4")
KWD 3
 Yongchuang DC 12V Normally Closed 2 Way 1/4" High Pressure Inlet Water Solenoid Valve RO Machine Drink Fountains Part
KWD 7
Yongchuang DC 12V Normally Closed 2 Way 1/4" High Pressure Inlet Water Solenoid Valve RO Machine Drink Fountains Part
KWD 7
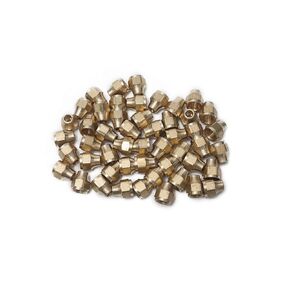 Brass 1/4" OD Short 45 Degree Flare Nut,Brass Flare Tube Fitting(Pack of 50)
KWD 11.500
Brass 1/4" OD Short 45 Degree Flare Nut,Brass Flare Tube Fitting(Pack of 50)
KWD 11.500
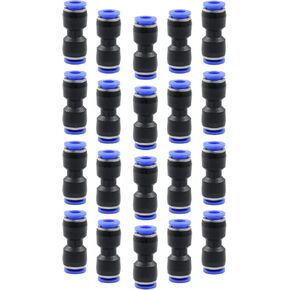 uvbws 20 Pcs Push to Connect Pipe Tube Straight Quick Fitting 1/4 Inch OD Pneumatic Air Connector
KWD 4
uvbws 20 Pcs Push to Connect Pipe Tube Straight Quick Fitting 1/4 Inch OD Pneumatic Air Connector
KWD 4


