- Shopping, made easy.
- /
- Get the app!
Strong Adhesion: The model can be firmly attached to the surface of the build plate. Double sided spring steel plate 184x184mm, compatible with Bambulab A1 MINI hotbed without sticker base. Made of high quality steel for durability and longevity. Installation Steps Step 1: Align the plate with the fixed points of the platform. Step 2: After the auto-bed leveling done, start printing.
 1-Pack Assembled 20mm V Gantry Plate Kit with Wheels Compatible with 2020 Series V-Slot Aluminum Profiles Linear Rail 3D Printer CNC
KWD 5
1-Pack Assembled 20mm V Gantry Plate Kit with Wheels Compatible with 2020 Series V-Slot Aluminum Profiles Linear Rail 3D Printer CNC
KWD 5
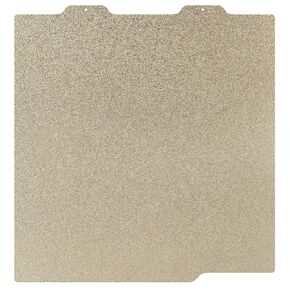 HICTOP Bambu lab A1 Mini PEI Sheet Double Sided Textured 184 * 184mm(7.24 * 7.24 inch) PEI Sheet PEI Build Plate for Bambu lab A1 Mini 3D Printer
KWD 7
HICTOP Bambu lab A1 Mini PEI Sheet Double Sided Textured 184 * 184mm(7.24 * 7.24 inch) PEI Sheet PEI Build Plate for Bambu lab A1 Mini 3D Printer
KWD 7
 -14%
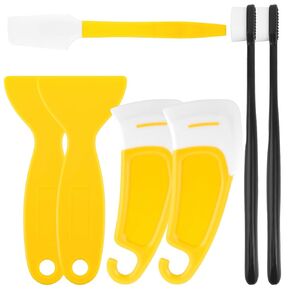
7Pcs UV Resin 3D Printer Must-Have Tool, Silicone Spatula, Scraper, Brush for Resin Transfer Cleaning and Protect Release FEP Film Vat Tank, 3D Printer Accessories
KWD 6
-14%
7Pcs UV Resin 3D Printer Must-Have Tool, Silicone Spatula, Scraper, Brush for Resin Transfer Cleaning and Protect Release FEP Film Vat Tank, 3D Printer Accessories
KWD 6
 Prusa I3 MK4 MK3 MK3S+ PEI Build Plate Double Sides Fine Powder Textured 3D Printer Platform Flexible Removal Spring Steel Sheet, 254x241mm/ 10x9.5inch
KWD 8
Prusa I3 MK4 MK3 MK3S+ PEI Build Plate Double Sides Fine Powder Textured 3D Printer Platform Flexible Removal Spring Steel Sheet, 254x241mm/ 10x9.5inch
KWD 8


