- Shopping, made easy.
- /
- Get the app!
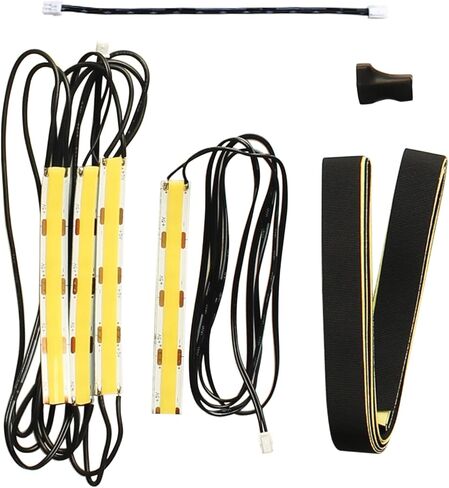
Upgrad part:
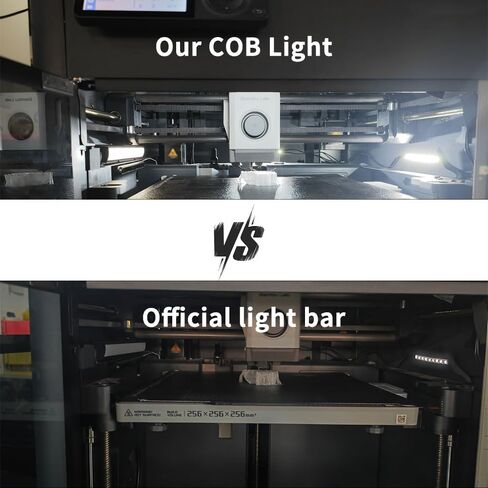
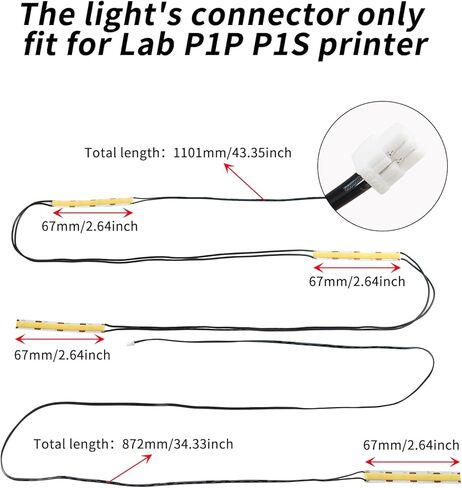
- This Light Kit and really lets you see what's going on. it's better than the stock light.
- It's pretty much up to you where to put the lights, of course we suggest install it under the front, right side, and rear, better than the right, rear and left sides.
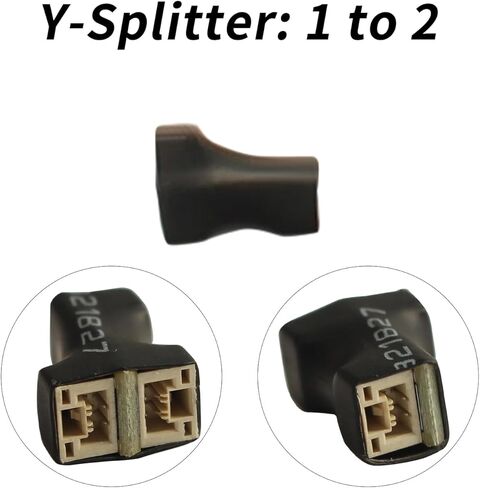
- Y splitter: solve the two section lights can both plug into the same socket. Only the 1 segment can work with the stock light together, under the adapter help. Another 3 segment light work well after removing the build in light.
- It plugs into the power port for the built in light this also gives you control over the light with the app just as you would normally. The lights come separated in 3 sections so you can spread them around to get a good wash of light across the bed. There is a fair amount of wire so depending on how you set it up you might need to coil some wire out of the way.
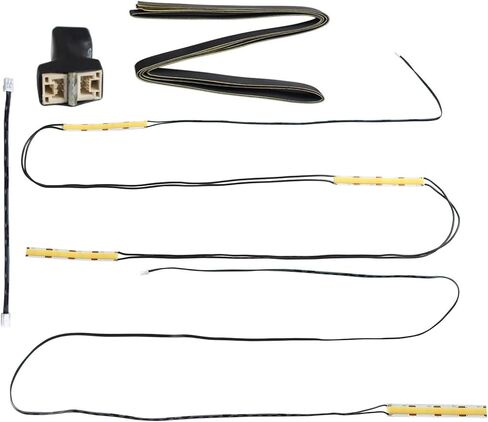
- These are incredibly easy to install. The pin connector is the same as the built in, OEM light, so it was plug and play for the most part. All you have to do is decide exactly where you want the and remove the adhesive backing and stick them on.
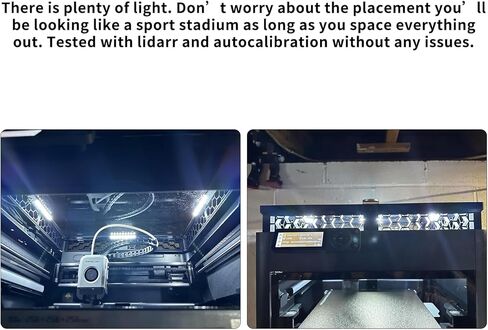
-The light has been increased considerable when viewing from the camera. With proper placement, it highlights what you are printing clear enough to cancel prints if they are not coming out correctly.
-The micro lidarr was NOT impacted by the increased lighting. some set-ups, like a light strip over your printer, the micro lidarr can read "errors" because of the increased light. With other light strip, you have to turn it off at the beginning of the print to avoid any errors. But With this light kit, you have yet to have to disable it due to the micro lidar.
Big Tips:
- Recommend using caution when installing and think about the wire placement to avoid any entanglement issues with the extruder and hot end. If you plan where you are going to run the wires, this lighting upgrade provides a nice increase in light that works in conjunction with the printer, just like the OEM light.
 FYSETC Prus i3 MK3S+ 3D Printer Extruder Motor NEMA17 42 Stepper Motor 2 Phase 1.8 Degree Shaft 20 with Integrated Connecting Wire Compatible with Prus i3 MK2 MK3 MK3S E Axis or CNC Machine
KWD 8
FYSETC Prus i3 MK3S+ 3D Printer Extruder Motor NEMA17 42 Stepper Motor 2 Phase 1.8 Degree Shaft 20 with Integrated Connecting Wire Compatible with Prus i3 MK2 MK3 MK3S E Axis or CNC Machine
KWD 8
 -7%
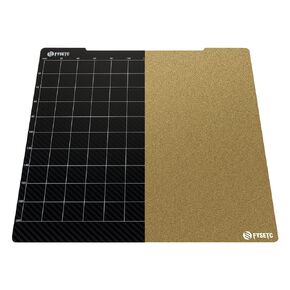
FYSETC Prusa Build Plate MK52 MK3S+ MK4 Spring Steel Surface: Textured PEI+ PET-CF Double-Sided Flexible PEI Sheet 253.8x241mm Hot Bed Cover for Filament PLA ABS for MK2 MK2.5 MK3 MK3S 3D Printer
KWD 12.500
-7%
FYSETC Prusa Build Plate MK52 MK3S+ MK4 Spring Steel Surface: Textured PEI+ PET-CF Double-Sided Flexible PEI Sheet 253.8x241mm Hot Bed Cover for Filament PLA ABS for MK2 MK2.5 MK3 MK3S 3D Printer
KWD 12.500
 FYSETC Ender 3 S1 V2 Print Bed 235mm/ 9.25in Spring Steel Build Plate JanusBPS Double Side Gold Powder Coated + Smooth PEI Platform+Sticker Base Compatible with Ender 3 Pro Ender 5 Pro 3D Printer
KWD 11
FYSETC Ender 3 S1 V2 Print Bed 235mm/ 9.25in Spring Steel Build Plate JanusBPS Double Side Gold Powder Coated + Smooth PEI Platform+Sticker Base Compatible with Ender 3 Pro Ender 5 Pro 3D Printer
KWD 11
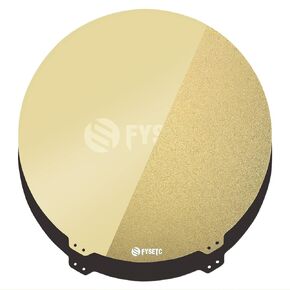
 FYSETC Flsn Super Racer Build Plate Round 270mm/ 10.6 inch Diameter Janusbps Spring Steel Sheet - Textured/Smooth Double Sided Removable PEI Sheet+Sticker Base for Flsn Super Racer 3D Printer
KWD 12.500
FYSETC Flsn Super Racer Build Plate Round 270mm/ 10.6 inch Diameter Janusbps Spring Steel Sheet - Textured/Smooth Double Sided Removable PEI Sheet+Sticker Base for Flsn Super Racer 3D Printer
KWD 12.500