- Shopping, made easy.
- /
- Get the app!
Introduction
Official Raspberry Pi PCIe To M.2 HAT, Designed For Raspberry Pi 5, Adapter For NVMe Protocol M.2 Solid State Drive, Compatible With 2230/2242 Size M.2 Solid State Drive, Supports Gen2 And Gen3 Modes, Supports Booting PI5 From Solid State Drive
Features
Support NVMe protocol M.2 solid state drive, high-speed reading/writing, higher operation efficiency.
Support PCI-E×1 Gen2 or Gen3 mode.
Only compatible with Raspberry Pi 5.
Compatible with 2230/2242 Size M.2 Solid State Drive.
Onboard operation indicator, PWR indicator is always on when power on; ACT indicator blinking while reading/writing, easy to learn its operation status.
Features HAT + design with onboard EEPROM chip.
Note: Raspberry Pi does not support booting From NVME by default, so you need to modify its setting.
Load
1. Enable PCIe interface:
2. PCIE selects GEN2 mode by default. If PCIE gen3 is needed, you can add the following content in /boot/firmware/config.txt: dtparam=pciex1_gen=3
3. Reboot the PI5 after modifying, and then the device can be recognized.
4. Partitioning: If partitioning and formatting have already been performed on another platform, skip this step. Caution: Partitioning and formatting will erase all data on the SSD, so proceed with caution.
5: Format
6: Load
Read/Write Test
1. Enter the directory to mount the disk: cd toshiba
2. Release the caches:
3.Copy the Raspberry Pi memory to the hard flash driver (write).
4.Copy the contents of the hard drive to the Raspberry Pi's memory. ("/etc/fstab" for reading).
Note: Different cards and environments may have different results. Raspberry Pi's performance is significantly affected, so for accurate performance testing, it's recommended to use a PC.
Package Content
Official Pi M.2 HAT+ x1
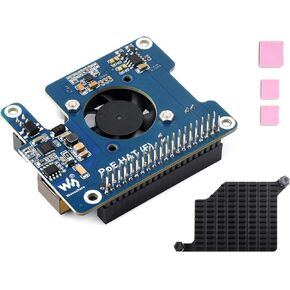 Waveshare POE HAT Board for Raspberry Pi 5, Power Over Ethernet HAT(POE) with Onboard Cooling Fan and Metal Heatsink, Supports 802.3af/at Network Standard,12V and 5V Power Outputs
KWD 12
Waveshare POE HAT Board for Raspberry Pi 5, Power Over Ethernet HAT(POE) with Onboard Cooling Fan and Metal Heatsink, Supports 802.3af/at Network Standard,12V and 5V Power Outputs
KWD 12
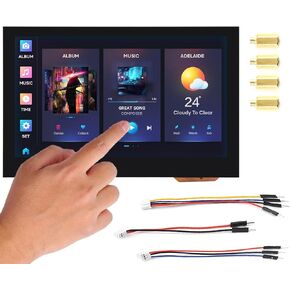 Waveshare ESP32-S3 4.3inch Capacitive Touch Display 800x480 Based on ESP32-S3 Microcontroller 5-Point Touch, 32-Bit LX7 Dual-Core Processor, Up to 240MHz Frequency, Support 2.4GHz WiFi & Bluetooth 5
KWD 15
Waveshare ESP32-S3 4.3inch Capacitive Touch Display 800x480 Based on ESP32-S3 Microcontroller 5-Point Touch, 32-Bit LX7 Dual-Core Processor, Up to 240MHz Frequency, Support 2.4GHz WiFi & Bluetooth 5
KWD 15
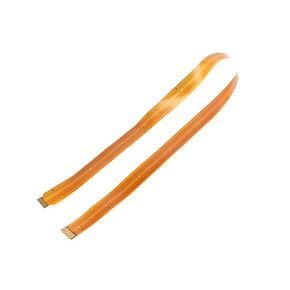 CSI FPC Flexible Cable For Raspberry Pi 5, 22Pin To 15Pin, 0.5 M Length, Suitable For CSI Camera Modules, Connecting CSI Camera Module to Raspberry Pi 5 or Compute Module 4, 500MM/50CM/0.5M Length
KWD 4
CSI FPC Flexible Cable For Raspberry Pi 5, 22Pin To 15Pin, 0.5 M Length, Suitable For CSI Camera Modules, Connecting CSI Camera Module to Raspberry Pi 5 or Compute Module 4, 500MM/50CM/0.5M Length
KWD 4
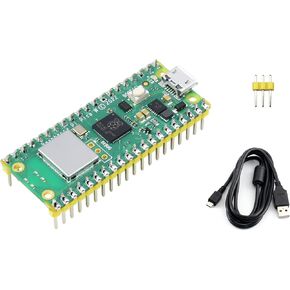 Built-in WiFi Raspberry Pi Pico W Microcontroller Board with Pre-soldered Header, Based on Official RP2040 Dual-core Processor, Dual-Core Arm Cortex M0+ Processor, with USB Cable
KWD 6.500
Built-in WiFi Raspberry Pi Pico W Microcontroller Board with Pre-soldered Header, Based on Official RP2040 Dual-core Processor, Dual-Core Arm Cortex M0+ Processor, with USB Cable
KWD 6.500


