- Shopping, made easy.
- /
- Get the app!
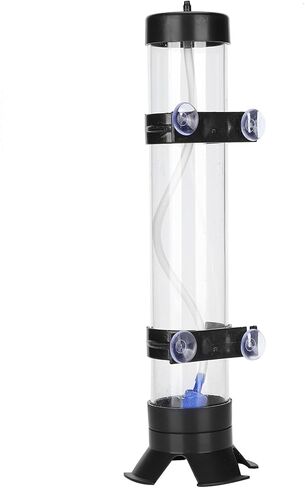
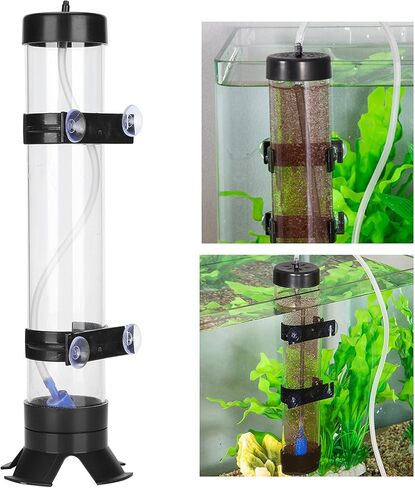
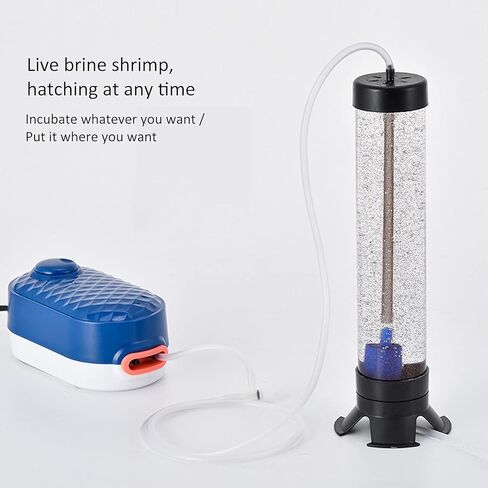
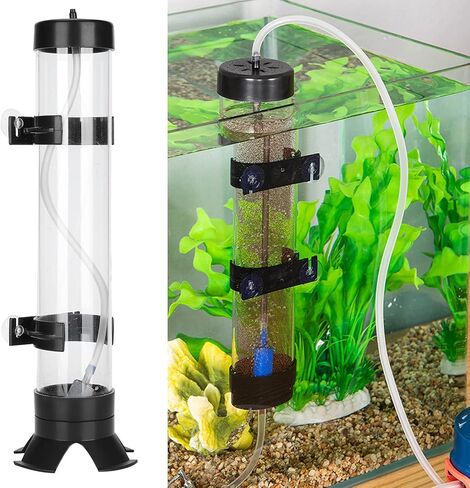
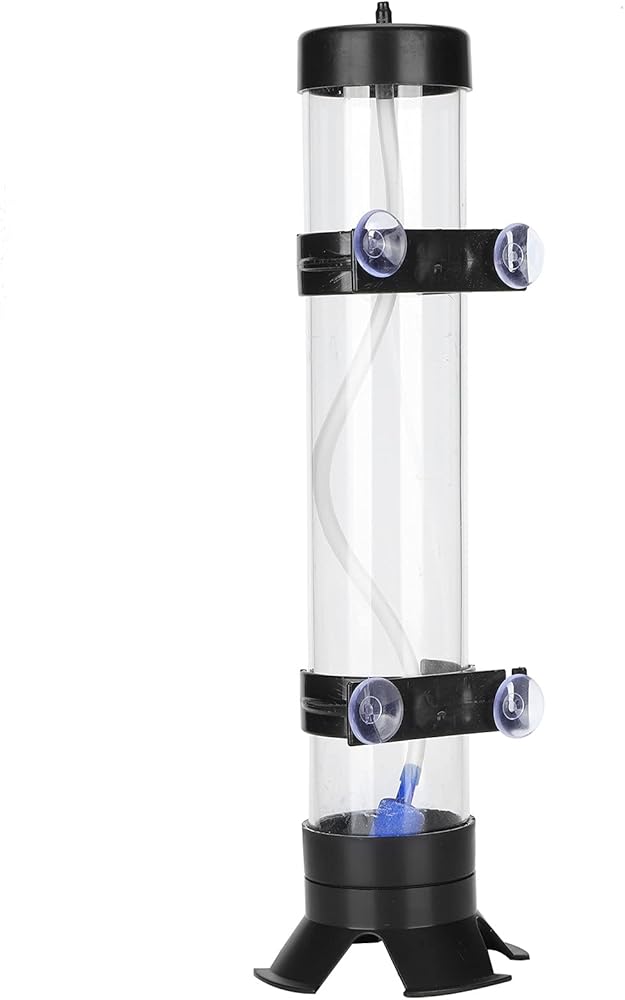
1. Upgraded version, amphibious (inside and outside the ). Incubate as you like, put it where you want.
2. Simple, practical, convenient to hatch shrimp for feeding fish. Easily harvest shrimp without muddy water.
3. The process is very simple, easy to ope e and use, and high incubation e.
4. Made of premium plastic material, non? and . A good and wise choice you should make.
5. The suitable tempe ure is 25?28 degrees, can be used directly in the .
Specification:
Item Type: Shrimp Eggs Hatcher Incubator
Material: Plastic
Weight: Approx. 238g / 8.4oz
How to use:
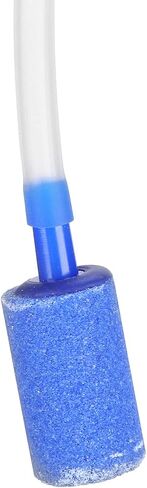
1. The clean water is ae ed first, and then 90% ae ed treated water is injected into the of the incubator, and then about 10g of coarse salt is added to the water to dissolve in advance.
2. Connect the ae ion pump to the air inlet at the bottom of the incubator, adjust the air volume to an appropriate size, and the appropriate tempe ure is 28-30?.
3. Put in about 3-5g of brine shrimp eggs and after about 36-48 hours (depending on the incubation tempe ure and the quality of brine shrimp eggs), it can hatch smoothly.
4. Collection ope ion: After the brine shrimp eggs hatch, stop oxygenation and let stand for about 10-15 minutes. The brine shrimps to be hatched sink to the bottom and the shrimp shells , and the brine shrimp larvae can be collected from the bottom of the incubator, and small fish can be fed. .
5. Please store uneaten brine shrimp larvae in the refrige or and freeze.
6.The top input of the simple brine shrimp egg incubator is the air supply port. Please adjust the input air volume yourself. If the input air volume is too large or too small, it will affect the and survival e of the brine shrimp eggs. Please adjust the input air volume with the air adjustment switch.
7. The air supply port on the top needs to be connected with a simple check valve, which
 2023 Aquarium Magnetic Cleaner, Magnetic Algae Scraper, Fish Tank Glass Cleaner Brush, Floating Algae Magnet Cleaning Tool Scrubber Brush Algae Remover for Aquarium Tank Cleaning
KWD 6
2023 Aquarium Magnetic Cleaner, Magnetic Algae Scraper, Fish Tank Glass Cleaner Brush, Floating Algae Magnet Cleaning Tool Scrubber Brush Algae Remover for Aquarium Tank Cleaning
KWD 6
 Aquarium Fish Tank, Three Divisions Breeding Isolation Mini Aquarium komplettset LED Acrylic Box for Small Fishes(Purple) (Purple)
KWD 10.500
Aquarium Fish Tank, Three Divisions Breeding Isolation Mini Aquarium komplettset LED Acrylic Box for Small Fishes(Purple) (Purple)
KWD 10.500
 FRAKS 25.6 inch Extendable Stainless Steel Algae Scraper Aquariums Fish Tank Scraper Cleaner with 10pcs Blades
KWD 5
FRAKS 25.6 inch Extendable Stainless Steel Algae Scraper Aquariums Fish Tank Scraper Cleaner with 10pcs Blades
KWD 5
 Salinity Tester, Automatic Accurate Salinity Meter with 0 to 40 Percentage Salinity Range Lightweight Sturdy Durable Sea Hydrometer for Fish Tank, Aquarium, Pond, Water, Saltwater, Freshwater
KWD 4
Salinity Tester, Automatic Accurate Salinity Meter with 0 to 40 Percentage Salinity Range Lightweight Sturdy Durable Sea Hydrometer for Fish Tank, Aquarium, Pond, Water, Saltwater, Freshwater
KWD 4