- Shopping, made easy.
- /
- Get the app!
Item specifics
Condition:New
Part Type:Bushing Installation Tool
Manufacturer Part Number: S21307
Bushing Type:Wide Beam Bushing
For use with Hendrickson Tri-Functional Wide Beam Bushing Kits
Ensure that threads on tool are well lubricated before and during use to avoid damaging threads
Bushing Installation Tool for Hendrickson Replace Part # S21307, E9575, TRB5912-T Automann
This kit will easily remove and install the Hendrickson Intraax Tri-Functional bushing while the suspension remains on the trailer. Made to service most Hendrickson, Hendrickson Turner, Watson Chalin, and Automann bushings
Removal of Bushing:
1.Scribe the bushing orientation on the beam tube and compression tube.
2.The spring pins are not required to line up with the bushing holes during removal.
3.Tighten retaining nuts to remove slack. Thread on hammer adapter in the event the bushing becomes seized. Hook up hydraulics and begin removal operation.
4.After each 2 inch stroke, re-tighten nuts to take up slack. (Most bushing will require 3-4 adjustments)
Installation of Bushing:
1.Lubricate the bushing and insert the bushing into compression cylinder.
2.Place the plunger on top of the bushing, align the mark on the bushing with the mark on the plunger. The 4 corresponding pins to the bushing type you are installing should seat into the bushing.
3.Tighten retaining nuts to remove slack. Thread on hammer adapter in the event the bushing becomes seized. Confirm the plunger is aligned with the scribed mark on the beam tube and the pins are still engaged in the bushing.
Hook up hydraulics and begin installation operation.
4.After each 2 inch stroke, retighten nuts to take up slack. (Most bushing will require 3-4 adjustments)
Cross References:
For BWP HE9AA-T
For Dayton 334-936
For Euclid E-9575
For Hendrickson S-21307
For Meritor R309575
For Sirco SH2034
For Tiger Tool 15040
Applications:
For Automann TS TRB5912
For Dayton TS 334-1576
For Euclid TS E-10729A
For Flagg TS HT245
For Gaff TS 13628
For Hendrickson TS S-24691
 12V AC Charger Fit for Sceptre-Curved E248W C248B/W C275B/W C278W C325W C328W E165W E205W E209W E225W E245W E248B E249B/W E265W E275B/W E278W E279W E300W Screen LED Monitor Power Supply Adapter Cord
KWD 7
12V AC Charger Fit for Sceptre-Curved E248W C248B/W C275B/W C278W C325W C328W E165W E205W E209W E225W E245W E248B E249B/W E265W E275B/W E278W E279W E300W Screen LED Monitor Power Supply Adapter Cord
KWD 7
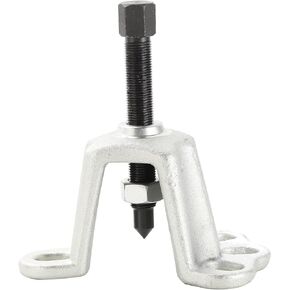 ATPEAM Axle & Front Wheel Hub Removal Tool | Front Hub Installer Puller Tool Universal FWD Tools Front Wheel Bearing Puller Auto Hub Puller Tool
KWD 8
ATPEAM Axle & Front Wheel Hub Removal Tool | Front Hub Installer Puller Tool Universal FWD Tools Front Wheel Bearing Puller Auto Hub Puller Tool
KWD 8
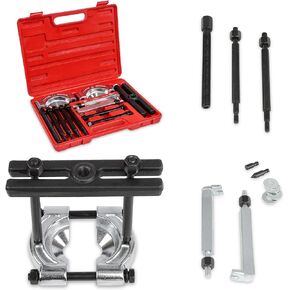 ABN Bearing Puller Kit - 14 Piece 5 Ton Automotive Bearing Separator - 2 and 3 Inch Jaw Splitting Gear Puller Tool Set
KWD 14
ABN Bearing Puller Kit - 14 Piece 5 Ton Automotive Bearing Separator - 2 and 3 Inch Jaw Splitting Gear Puller Tool Set
KWD 14
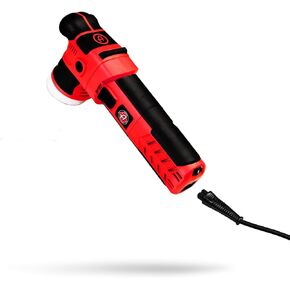 Adam's Polishes SK Pro 12mm Car Polisher Kit (10 Item) - Professional Dual Action Polisher for Car Detailing - Paint Correction, Waxer Buffer DA Polisher - Variable Speed Car Polisher System
KWD 70.500
Adam's Polishes SK Pro 12mm Car Polisher Kit (10 Item) - Professional Dual Action Polisher for Car Detailing - Paint Correction, Waxer Buffer DA Polisher - Variable Speed Car Polisher System
KWD 70.500


