- Shopping, made easy.
- /
- Get the app!
Product Information
Size & Weight
2 inch Gasket: 3.88*3.66*0.10 inch (9.36 oz)
2.25 inch Gasket: 4.08*4.00*0.10 inch (9.64 oz)
2.5 inch Gasket: 4.43*4.26*0.10 inch (9.71 oz)
3 inch Gasket: 5.02*4.80*0.10 inch (9.82 oz)
Screw Thread: 1.38*0.39*0.39inch
Screw Nut: 0.70*0.70*0.31inch
Material: Stainless Steel, Graphite
Color: Sliver
Package: 2x Exhaust Flange Gasket + 6x Screw Thread + 6x Screw Nut
Product Features
Lightweight and Compact: The graphite composite material used in the exhaust flange gaskets ensures they are lightweight yet robust, making them easy to handle during installation and reducing overall vehicle weight
Tips: We kindly recommend you can measure the required dimensions accurately advance. Please refer to the annotations in the picture for specific sizes. By taking the time to measure beforehand, you can avoid any inconvenience caused by incorrect sizing and keep a seamless installation process
Product Installation
Preparation: Begin by keeping that your workspace is well-lit and that you have all the necessary tools at hand, such as a socket wrench or ratchet, screwdriver
Inspection: Before removing the old gaskets and bolts, inspect the exhaust flange and surrounding areas for any debris. Clean the surfaces thoroughly to keep a proper seal
Removal: Carefully remove the old gaskets and bolts, taking note of their position for easy reinstallation reference if needed
Positioning the New Gaskets: Place the new graphite composite gaskets onto the exhaust flanges, aligning them precisely with the bolt holes
Installing the Bolts and Nuts: Thread the exhaust bolts through the gaskets and into the corresponding holes on the mating flanges. Hand-tighten the bolts initially to avoid cross-threading. Then, using the appropriate tool, tighten the bolts and nuts
Verification: Once all bolts and nuts are tightened, double-check that the gaskets are seated properly and that there are no leaks or gaps
Final Inspection: Perform a final inspection of the entire installation, keeping that all components are secure and functioning correctly. Start the engine and listen for any unusual noises or vibrations that may indicate an issue

 -9%
3/16 Brake Line Kit with 16 Brake Line Fittings and Tubing Bender,Double & Single Brake Line Flaring Tool Kit Car Accessories Fits for Most Hydraulic Braking Systems
KWD 15
-9%
3/16 Brake Line Kit with 16 Brake Line Fittings and Tubing Bender,Double & Single Brake Line Flaring Tool Kit Car Accessories Fits for Most Hydraulic Braking Systems
KWD 15
 Car Engine Crankshaft Position Sensor,Nylon Crankshaft Sensor Replaces OEM#39180-2B000 SU13885,Professional Car Accessories Crank Sensor Compatible with Hyundai Kia Dodge Attitude
KWD 4
Car Engine Crankshaft Position Sensor,Nylon Crankshaft Sensor Replaces OEM#39180-2B000 SU13885,Professional Car Accessories Crank Sensor Compatible with Hyundai Kia Dodge Attitude
KWD 4
 Car Push Start Button Cover,Fashionable Push to Start Button Cover for Car Decorations & Button Protections,Universal Interior Car Accessories Ignition Start Stop Button Cover (Black)
KWD 3
Car Push Start Button Cover,Fashionable Push to Start Button Cover for Car Decorations & Button Protections,Universal Interior Car Accessories Ignition Start Stop Button Cover (Black)
KWD 3
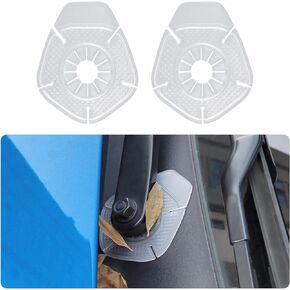 2PCS Car Windshield Wipers Hole Dust Cover,Premium Silicone Wiper Blades Hole Protection Device Prevents Blockage,Universal Automotive Exterior Accessories Fits Car Truck SUV (Black)
KWD 2.500
2PCS Car Windshield Wipers Hole Dust Cover,Premium Silicone Wiper Blades Hole Protection Device Prevents Blockage,Universal Automotive Exterior Accessories Fits Car Truck SUV (Black)
KWD 2.500


