- Shopping, made easy.
- /
- Get the app!
The SAE flange is a high-pressure hydraulic flange used to connect pipes and tubes together in a hydraulic system. The leak free connection is suitable for high pressures, larger sizes and assembly in tight quarters. SAE blind flanges are used in oil hydraulic systems to block the passage of fluids.
This SAE blind flange meets the standard of SAE J518 and ISO 6162. The material used is carbon steel ST52.3. This steel grade is readily weldable with excellent resistance to external impact. It is a type of low alloy steel with great tensile strength. The body made is made via normalized forgings. Normalization process increases the hardness and strength of steel.
As for the working pressure, this four-bolt blind flange can withstand pressure up to 6000 PSI. It is also categorized under Code 62 flanges, where the pressure range for this series is up to 6000 PSI. The allowable working temperature for steel blind flange is -40°C - +120°C.
O-ring SAE blind flange contains a groove seat to place a rubber O-ring. O-ring SAE blind flange helps to avoid leakage as all metal-to-metal flanges are more prone to leakage. Install it with flat face SAE flange with cap screws and spring washers.
For proper installation, check out the simple steps below.
Step 1: Ensure the sealed surface is free from scratches and contamination. Apply lubricant on the seal.
Step 2: Position the flange and place the washer on the cap screws to bolt through the bolt holes.
Step 3: Screw on the cap screws by hand first then tighten with a wrench to its appropriate torque value.
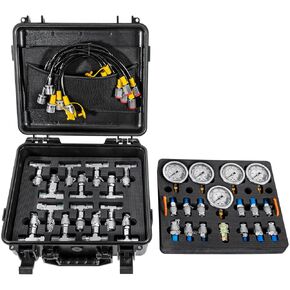 70DC Digital Hydraulic Pressure Test Coupling Kit Hydraulic Pressure Gauge Kit for Excavator Construction Machinery 2 Gauges 2 Test Hoses 18 Couplings 29 Tee Connectors 700BAR/10000PSI/70Mpa
KWD 340
70DC Digital Hydraulic Pressure Test Coupling Kit Hydraulic Pressure Gauge Kit for Excavator Construction Machinery 2 Gauges 2 Test Hoses 18 Couplings 29 Tee Connectors 700BAR/10000PSI/70Mpa
KWD 340
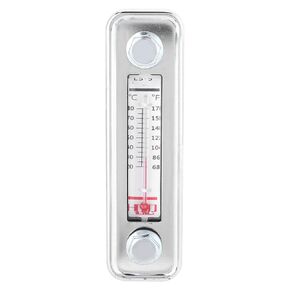 Oil Temperature Oil Level Gauge with Thermometer, Liquid Level Gauge Meter Transparent Intuitive Display Good Sealing Accurate
KWD 5.500
Oil Temperature Oil Level Gauge with Thermometer, Liquid Level Gauge Meter Transparent Intuitive Display Good Sealing Accurate
KWD 5.500
 NDhydr 20T Hydraulic Cylinder Jack Hollow Single Acting Hydraulic Ram Cylinder 2"(50mm) Hydraulic Lifting Cylinders for Shipbuilding, Bridge, Construction
KWD 76.500
NDhydr 20T Hydraulic Cylinder Jack Hollow Single Acting Hydraulic Ram Cylinder 2"(50mm) Hydraulic Lifting Cylinders for Shipbuilding, Bridge, Construction
KWD 76.500
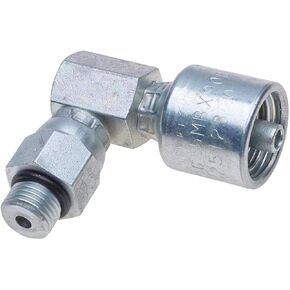 Gates G25123-0406 Male O-Ring Boss Swivel - 90 Block (MegaCrimp)
KWD 13.500
Gates G25123-0406 Male O-Ring Boss Swivel - 90 Block (MegaCrimp)
KWD 13.500


