- Shopping, made easy.
- /
- Get the app!
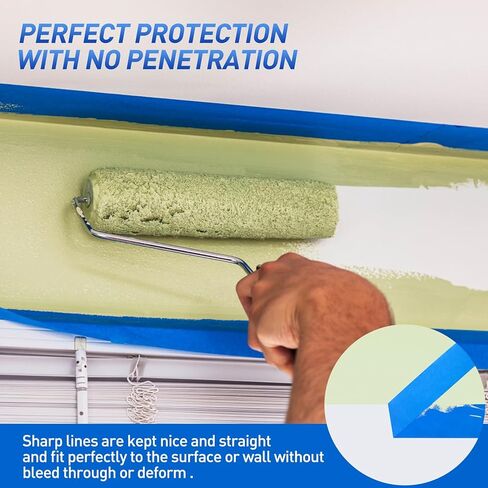
If stronger adhesion is needed, press the tape firmly with your hand after application.
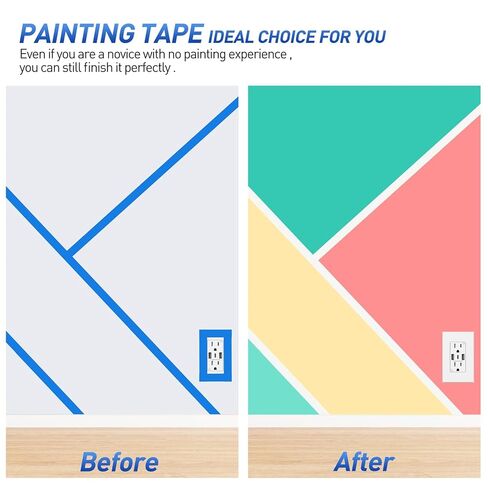
Surface Prep & Tape Application
1. Clean the Surface
Ensure the surface is clean, dry, and dust-free so the tape adheres properly.
2. Apply the Tape
Lay the tape onto the surface, pressing it down as you go. Avoid stretching the tape, as this can cause it to lift or break.
3. Secure the Tape
Press the tape down securely with a smooth edge, such as a putty knife or credit card, to create a good seal and prevent paint from bleeding underneath.
4. Let the Tape Set
Wait about 30 to 60 minutes before beginning to paint to ensure the tape is properly set.
5. Wait for Paint to Dry
Allow the paint to dry to the touch before removing the tape. Refer to the paint can for the manufacturer's recommended drying times.
6. Score the Edge
Use a putty knife or razor blade to score along the edge of the tape. This step helps prevent paint from peeling up with the tape and avoids cracking along the paint line.
7. Remove the Tape
Carefully lift the painter's tape and pull it back on itself at a 45-degree angle. If the adhesive sticks to the surface, try a 90-degree angle.
8. Achieve a Clean Finish
Following these steps will help you achieve a sharp, clean line and a professional-looking paint job!
 Good news PTFE Telfon Tape high Temperature Tape Welding Sealing Tape for Vacuum Sealer Machine(Brown, 50mm x 11yards(33feet) x 0.18mm)
KWD 7
Good news PTFE Telfon Tape high Temperature Tape Welding Sealing Tape for Vacuum Sealer Machine(Brown, 50mm x 11yards(33feet) x 0.18mm)
KWD 7
 Starbond EM-600 Medium Thick, Premium CA - Cyanoacrylate Adhesive Super Glue (for Woodturning, Hobby, Screen Printing, Lapidary) (2 Ounce)
KWD 6.500
Starbond EM-600 Medium Thick, Premium CA - Cyanoacrylate Adhesive Super Glue (for Woodturning, Hobby, Screen Printing, Lapidary) (2 Ounce)
KWD 6.500
 Lichamp 6-Pack Seal Self Fusing Rubber Tape for Electric Cable Splicing and Pipe Water Leak Repair, 1-inch x 10-feet x 6 Rolls
KWD 7
Lichamp 6-Pack Seal Self Fusing Rubber Tape for Electric Cable Splicing and Pipe Water Leak Repair, 1-inch x 10-feet x 6 Rolls
KWD 7
 EZ-ier Tape Double-Sided Containment and Dust Barrier Tape (2" x 60')
KWD 12.500
EZ-ier Tape Double-Sided Containment and Dust Barrier Tape (2" x 60')
KWD 12.500