All electronics ship with US style plugs.You may need a voltage converter or a plug adapter.
Special Features
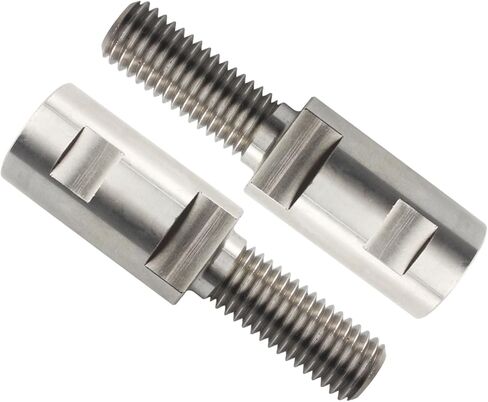
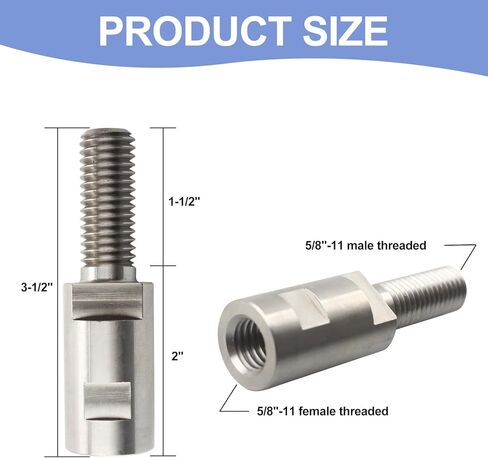
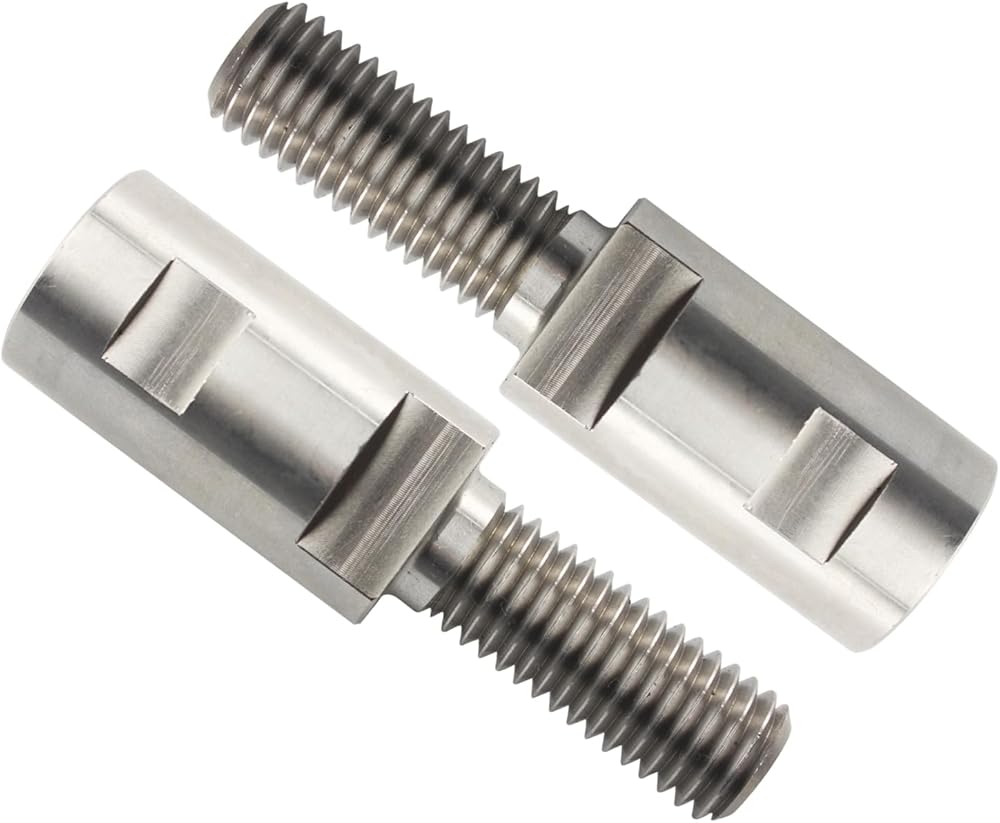
Female threads are 5/8‘-11 to fit a variety of 5/8' angle grinders; male threads are 1-1/2‘ long for mounting cloth wheels up to 1', or two thin cloth polishing wheels or airway polishing wheels; extension shafts are up to 3-1/2' inches long to keep the angle grinder and the polishing wheels far enough apart to effectively improve Work efficiency
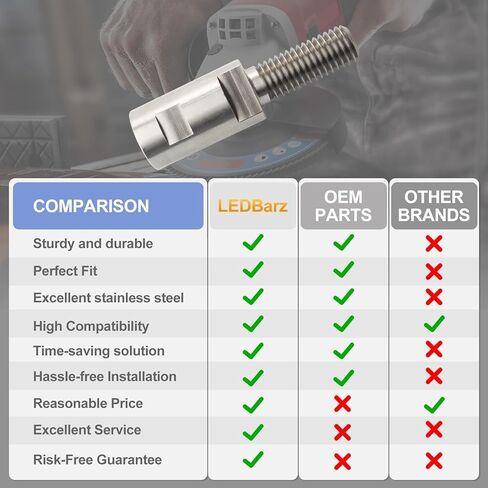
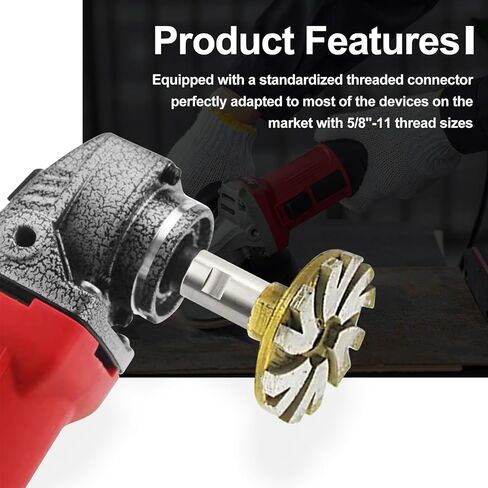
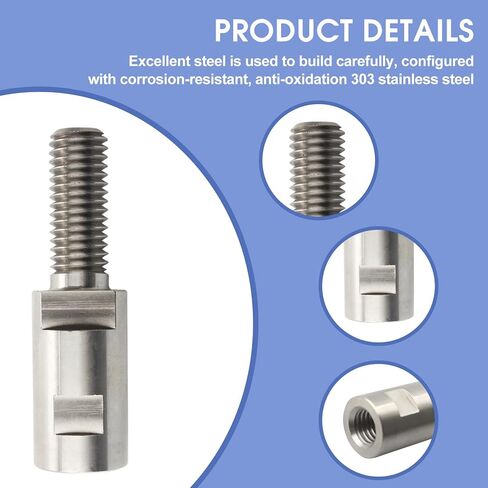
Our angle grinder extension rods are equipped with a standardised threaded connector that is perfectly adapted to the majority of angle grinders and polishing machines on the market with a thread size of 5/8''-11. The threads are carefully designed for quick mounting and dismounting, which not only saves valuable time, but also ensures a secure connection and eliminates the risk of loosening, thus providing peace of mind
Designed to work seamlessly with a wide range of accessories such as grinding wheels, diamond concrete wheels, surface grinding wheels, sanding discs, polishing machine tools, cutting and flanging blades, these angle grinder attachments are designed to fit into confined or inaccessible spaces. They not only perform efficient and safe polishing operations, but also provide a one-stop solution for a wide range of processing needs, meeting a full range of work requirements
Meticulously crafted from excellent quality steel, this angle grinder extension shaft is made of corrosion and oxidation resistant 303 stainless steel, giving it excellent support and load-bearing capacity. Its sturdy structure and excellent durability can effectively resist deformation and breakage, ensuring long-term stability and excellent performance. In addition, the extension bar is able to maintain a constant rotational speed and significantly reduce vibration, thus significantly improving overall work efficiency
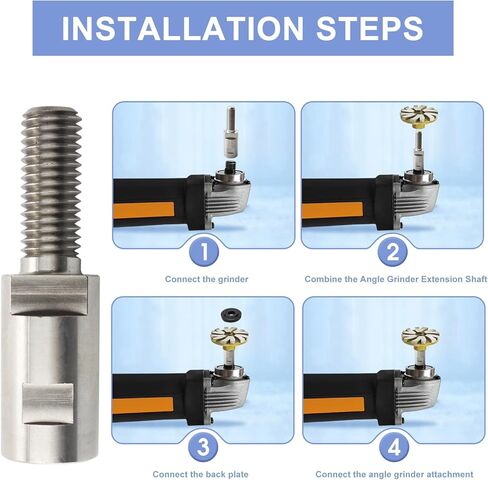
Step 1: Manually install the bearing adapter onto the angle grinder precisely to ensure that it is secure; Step 2: Press the anti-rotation switch of the angle grinder and lock the bearing adapter with a spanner until it locks; Step 3: Install the required accessories for the angle grinder (note that the accessories are not included here). Press the anti-rotation switch and then manually tighten the nut step by step to ensure initial fixation; Step 4: Press the anti-rotation switch again and use a spanner (also not included) to lock the nut completely until it is secure and safe
Description
Step 1: Manually install the bearing adapter onto the angle grinder precisely to ensure that it is secure; Step 2: Press the anti-rotation switch of the angle grinder and lock the bearing adapter with a spanner until it locks; Step 3: Install the required accessories for the angle grinder (note that the accessories are not included here). Press the anti-rotation switch and then manually tighten the nut step by step to ensure initial fixation; Step 4: Press the anti-rotation switch again and use a spanner (also not included) to lock the nut completely until it is secure and safe
 Angle Grinder, GOCHIFIX Brushless Grinders Tool 20v 4-1/2 Inch Cordless Grinders Power Tools with 4.0Ah Battery & Fast Charger, Grinding & Cutting Wheels, for Workshops, Car Repair Shop or Home Lovers
KWD 31.500
Angle Grinder, GOCHIFIX Brushless Grinders Tool 20v 4-1/2 Inch Cordless Grinders Power Tools with 4.0Ah Battery & Fast Charger, Grinding & Cutting Wheels, for Workshops, Car Repair Shop or Home Lovers
KWD 31.500
 Bestgle 3 PCS M14 Thread Angle Grinder Extension Connecting Rod, Rotary Extension Shaft Set for Polisher and Angle Grinder(75mm 100mm 140mm)
KWD 5.500
Bestgle 3 PCS M14 Thread Angle Grinder Extension Connecting Rod, Rotary Extension Shaft Set for Polisher and Angle Grinder(75mm 100mm 140mm)
KWD 5.500
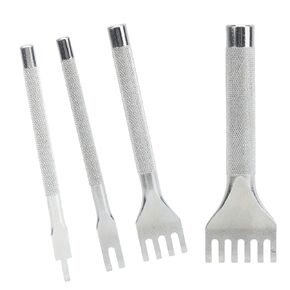 Lacing Chisel Set, High Temperature Heat Treatment Precise Flat Spacing Prong Working Chisel for Industrial(1+2+4+6 Teeth Set)
KWD 5
Lacing Chisel Set, High Temperature Heat Treatment Precise Flat Spacing Prong Working Chisel for Industrial(1+2+4+6 Teeth Set)
KWD 5
 Air Die Grinder Tool 25,000 RPM Complete with 41pc Quick Change Sanding Kit
KWD 20.500
Air Die Grinder Tool 25,000 RPM Complete with 41pc Quick Change Sanding Kit
KWD 20.500